Search This Blog

Sunday, December 9, 2018

NATIONAL QUILTER'S CIRCLE MYSTERY MEDALLION WEEKS 7 AND 8


It is hard to believe it is finally at an end. (Click on the above link for the final instructions.) I can't wait to see what the final quilts look like. This has been such a wonderful experience for me. Especially since it is my first mystery quilt. I hope if I do another one that there will be just as much excitement as there was with this one. For those who haven't started or say that they are behind, please share your progress. The pattern will be available for anyone who wants it. Maybe it will reach 100,000 worldwide! We are more than halfway there!

I didn't get a chance to write my blog last week. Since the block was similar to week's 6 I didn't feel the need to write instructions. I do want to show an experiment I did with the 4 Flying Geese method since there were two different fabrics in them. I knew what the result would be but I went ahead and tried it anyway.

To use two different fabrics in the smaller triangles of the Flying Geese units you would go ahead and cut the smaller squares as indicated in the instructions. Start by placing two of the same squares on opposite ends of the large square (after drawing the lines down the center) and sew 1/4" on both sides of the line. Cut apart and press triangles back.


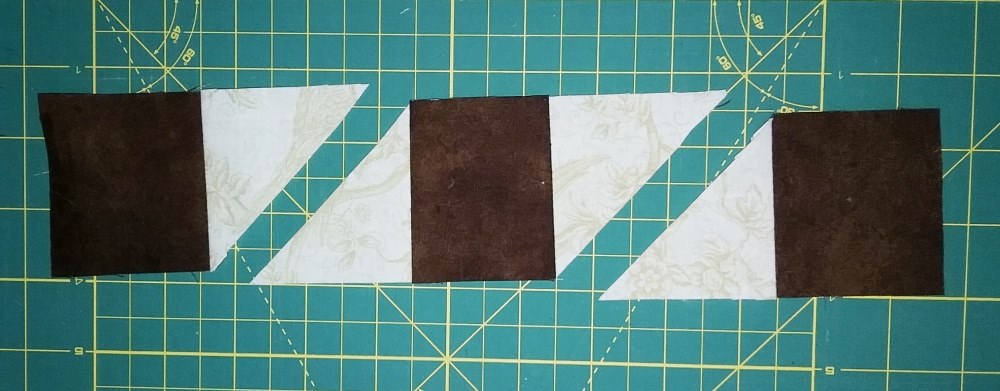
Now place the second fabric small squares on the corners, sew 1/4" on each side of the line and cut apart. What you end up with is four Flying Geese units, two pairs with the fabrics on opposite sides.


Another option would be to start with the two different fabrics on the opposite sides in the first step. Then place the matching fabric on the resulting sections and you will end up with two pairs of Flying Geese units with the same fabrics. (I hope this makes sense.)

SEWING BORDERS

The one big problem I found with beginner quilters is how to measure and sew on borders so I thought I would address some of the problems today.

SQUARING UP THE TOP OF YOUR QUILT BEFORE PUTTING THE BORDERS ON

One thing that makes sewing borders on easier is to make sure that your top is square. I am not referring to whether it is a "square" but the term "square up" just means that the edges of the quilt are the same size. Many times when you have a lot of blocks to piece together, they are not always the same size across the quilt so when you go to put the borders on, one side of the quilt is longer or shorter than the other side. So, how do you check to see if all the sides are the same?

I have a very easy method that is used by quilt judges when they judge how well a quilt is constructed. First find a large space to lay the quilt down. You can use a floor or large bed. I use my quilting machine and lay the quilt along one of the bars. Now take each end (either the top and bottom or sides) and fold them to the center of the quilt. If your seams are consistent the edges of the quilt should be the same size as the center. I have to admit even as careful as I am to have consistent seams, I am not perfect and sometimes the measurements are not the same. They may be off just a small amount (1/4" to 1/2"). 

I have a couple option at this point. If the edges are slightly bigger than the center, I can trim a little off each end. If they are slightly smaller than the center I can take in some seams a little across a few of the seams on both side of the center. The other option is to take the three measurements (center and opposite ends) add them together and get the average (divide that number by 3). This last option is best if your measurements are off more than 1/2" and it is difficult to trim the sides to equal the center. I will then cut my borders to that measurement.

SEWING PIECED BORDERS TO THE QUILT

Now that you have squared up your top and you need to add pieced border sections to it, you need to measure your pieced section to make sure it is the same size as the quilt top. What if it isn't? Again, there are always to make adjustments. If it is too small, take some seams out and shorten them across the strip until you get close to the measurement. (If it is less than 1/2" you can always ease the section in.) If it is too big then take in some seams across the section. You don't have to use your ripper to make the seams bigger.

CUTTING, PINNING AND SEWING THE BORDERS

Here is where most beginner (and even some advanced quilters) make the biggest mistakes when sewing on the border strips. You can either measure each of the sides and cut your borders to that size or (this is what I do) lay the quilt on a flat surface (again, I lay it on my quilting machine bar) and take my sewn strips (the two at the same time) and lay them across the center of the quilt. I then make a couple clips on the border strips even with the quilt top on both edges and take them to my cutting table and trim them at the clips with a ruler.

Now here is the most important part. Pin, pin, pin, pin! I match and pin the centers of the quilt and the border strips and ends. Then I start pinning always dividing the sections in half, placing a pin, then halves, pin, halves pin until I have pinned the entire border. I usually have my pins about 3" to 4" apart when I am done. If you have to ease in either side, whether it is the quilt side or border side, place the larger of the two pieces on the bottom by the feed dogs. That side will ease in better than if it is on top. It is also easier to pin the two together if you lay it on a flat surface rather than hold it up. Now you are ready to sew.

No matter how many borders you have to piece, you need to repeat this process every time. You will find that your quilt will lay nice and flat and if you have to take it to a longarm quilter she will thank you for that.

One more tip and this has to do with the backing. Make sure that you make your backing 4" - 8" bigger all around the quilt depending on your longarm quilter. Some even request that you make it even bigger than that. If you have trouble squaring up your backing consider tearing the fabric along the grain. If you do that you will want to make it slightly bigger because tearing it does cause at least 1/2" or more to be stressed along the edges.

I know I didn't show a lot of photos in this blog. I hope my descriptions will be enough for you to understand.

DRAWING WINNER

The winner of one of my Cutting Corners template sets is Paula (Bergan?). Congrats Paula. I will be sending her an email so I can mail the template set to her. 

NATIONAL QUILTER'S CIRCLE


National Quilter's Circle is offering a great special on their membership. For only $25 you can get a Gold membership and get free classes and free downloads for a year! Use this link to get the special price and please use this code "TOBY25" when checking out. I want to say that I do get a bonus if you use my code.


Watch for my end of the year fabric inventory clearance sale. Be sure to sign up for my newsletter on my website so you can get notification as to when it starts.

As always, do what you love and love what you do. Thanks for reading and feel free to forward and share with your friends. Please leave a comment if you like this blog and learned something from it! Toby

Monday, November 26, 2018

NATIONAL QUILTER'S CIRCLE MYSTERY MEDALLION WEEK 6 BLOCK 5


I know I am repeating myself, but I am amazed at the creativity of some quilters! Some have added their owns special touch in the inner border or changed blocks around or even added elements to the blocks. The difference in fabrics in this design also changes the whole look of the quilt. I don't know if that is because it is a mystery or if the quilters would have picked the same fabrics if it was not a mystery. I'd love to hear from you whether you would like to do another medallion style quilt and whether you would want it as a mystery or know ahead of time what the finished product would look like.

This block is another with the dreaded Flying Geese units but I'm assuming that you are now experts at them! 

I used my Cutting Corners template set for this block to cut out my half-square and quarter-square triangles. If you are using this set, you will cut 2-1/2" strips for both.


For the quarter square triangles in the pinwheel I cut them according to the instructions but I trimmed the corners with my triangle template.


After piecing the two quarter-square triangles, they should be the same size at the half-square triangle they are being sewed to. Adjust if necessary.


When sewing the four pinwheels, check to make sure that the darker fabric is facing in the right direction before sewing the four together and spin the center seam to reduce bulk. If you don't know how to do that, check on one of my previous blogs where I posted a video on how to do that.


Sew the 9 sections together as in previous posts.


WINNERS AND NEW DRAWING

I thank everyone who left a comment and took the time to read my blog. This week's winners are Regina Conklin and Melanie (she did not leave a last name). They get to pick a pattern pdf on my website. I will send them an email to let them know. This week I will pick another winner to get my Cutting Corners template set. Be sure if you leave a comment you also leave your email address.

NATIONAL QUILTER'S CIRCLE


National Quilter's Circle is offering a great special on their membership. For only $25 you can get a Gold membership and get free classes and free downloads for a year! Use this link to get the special price and please use this code "TOBY25" when checking out. I want to say that I do get a bonus if you use my code.


WEBSALE

I am having a Cyber Monday sale today only. You can purchase anything on my website (except for end of bolts) and get 40% off! Write "Cyber Monday" in the coupon box when checking out for the discount. All orders over $25 (after discount is applied) will receive my Kaleidostars book FREE! You can start shopping NOW.

As always, do what you love and love what you do. Thank you for reading and sure to share with your quilting friends.

Tuesday, November 20, 2018

NATIONAL QUILTER'S CIRCLE MYSTERY MEDALLION WEEK 5 BLOCK 4

(Click on highlighted text to link you to the items.)


BLOCK 4


I love the quilting community. Everyone is so willing to share. I never stop learning. Even though I have been teaching quilting for over 20 years I am still learning from my students. After the directions came out for block 4 I was reading the posts and someone posted another way to piece this block. It was ingenious! I asked her if I could share it and she said I could. Carolyn Acrey Shepard was the one who came up with it and I will share it after I show my way of doing the block.

For those who have my Cutting Corners template set you can cut the triangles with the triangle template using a 2-1/2" x WOF strip instead of cutting squares and then cutting them into half-square triangles as in the original instructions. I really like using it because I can trim the corners of the triangles and they fit with the squares without any dog ears to cut off. 


You can also use it to cut the large triangles using a 4-1/2" strip.


Once you have all of your pieces cut out, lay them out to the left of your sewing machine. You can piece these just like I showed how to piece the nine-patch blocks. (Sorry the white fabric is hard to see on the white quilting surface.)


Fold the middle column (square and triangle) on top of the first column (matching triangle and square). See how nice they match with no edges sticking out! Pin and sew one right after the other. Do NOT clip the threads. Press to squares.


Fold third column square and triangle over on the second column triangle and square. Pin and sew one right after the other. Do NOT clip threads. Press to squares.


This is what it looks like so far.


Fold first row down, match seams, pin and sew together. Press seam up.


Fold bottom row up. Match seams, pin and sew together. Press seam down.


The resulting section.


Now you are ready to sew on the side triangles. Since I cut them using my "Cutting Corners" triangle, I don't have to match the center. The triangle ends meet the ends of the squares perfectly. Otherwise you do have to match the centers, pin and sew.


Repeat on the other side. Section should equal 6-1/2" square.


Here is how Carolyn did it. She made a strip set of 3 dark strips at 
2-1/2" x LOF and 2 light strips at 3-1/8" x LOF. She sewed the strips together with 1/4" seams and pressed to the dark fabrics. She then cut the strip set into 2-1/2" sub strips. Don't forget to even up the edge before cutting it into subsets.


Then cut the cut strip set into 3 sections. Cut from corner to corner of the triangles.


Now line them up and sew them together like I did matching seams. Wasn't that fast!


One more thing I want to demonstrate. I saw the question of what is a diagonal seam. Ashley did a great video on that. I use diagonal seams because they don't show up as much in borders as a straight seam does. Also on bindings it has less bulk when you fold them in half and then sew them on your quilt. 

There are many ways to sew diagonal seams. This is what I do. I like to overlap the two edges, right sides together, so that a small amount sticks out from the two strips. I use my cutting mat to line up the strips on the lines so that they are at 90 degree angles to each other. Pin them together and draw a line from intersection to intersection (where the two strips cross over each other). Your needle should start and end where they cross over each other, when you sew them together. Then trim the seam to 1/4" and press the seams open. I like to press them open to reduce bulk but there is no hard and fast rule about it.

NATIONAL QUILTER'S CIRCLE


National Quilter's Circle is offering a great special on their membership. For only $25 you can get a Gold membership and get free classes and free downloads for a year! Use this link to get the special price and please use this code "TOBY25" when checking out. I want to say that I do get a bonus if you use my code.


I still have lots of great end of the bolt fabrics on sale. Don't miss out. I will be having a great Black Friday and Cyber Monday sale so be sure to check out my website on Friday and Monday for the special code for a great discount!

As always, do what you love and love what you do. Thanks for reading and be sure to share with your quilting friends. Don't forget to leave a comment and your contact information for a chance to win one of my patterns.

Saturday, November 17, 2018

NATIONAL QUILTER'S CIRCLE MYSTERY MEDALLION WEEK 5 LAP QUILT

(Click on any of the red highlighted text for links)

LAP QUILT


Every day I am amazed at how many different versions there are of my design. Some I wish I had thought of myself! I have been rushed to get this quilt finished so I wish I had had more time to really work on some of the things I like to do, such as fussy-cutting. There have been some really fantastic versions with fussy-cutting in different parts of the blocks. Some have even added their own versions of the blocks by adding a pinwheel or other designs in the center of the blocks. That is what I love about quilting. There are no right or wrong ways to do something. You are only limited by your imagination! Of course if you are a beginner you will want to follow the directions to a "t" but if you are a veteran quilter, feel free to put in your own flair.

For this blog I will show you a couple ways to do mitered corners and how to make adjustments if your blocks don't fit your center. I hope that after you read it you will ask any questions and let me know if you have a problem that I have not addressed here. I can't answer comments at the end of the blog so be sure to ask them on the Facebook page.

One of the things that happened to me when I was getting ready to put the border on the quilt was the stripe fabric that I chose for the border only had 3 small stripes instead of 4 on the width of the fabric. Usually most border fabrics have 4 large and 4 small border stripes in them. I had cut 2 one yard cuts from the fabric to sell, so I decided to use that so I could get 4 stripes. The only problem was 1 yard wasn't enough to put on the edges of the quilt. So I had to do some creating sewing! Here is what I did and how you can piece a border strip when it isn't big enough.

Use two border stripe pieces cut to the same size. Press one edge of the stripe 1/4" towards the back.


Find the match of the same design that is on the edge of the fold to the second border stripe.


Place a small line of glue (I use Elmer's School Glue) along the fold and then press it with a hot iron to the second border where they match.


Fold back and trim seam to 1/4" (along cut edge of first strip). Sew along at the 1/4" fold. Your strip is now ready to be trimmed and sewn to the quilt.


MITERED BORDERS

When sewing on mitered borders it is important to measure the width and length of your quilt. It is best to measure the center of your quilt to determine the measurement. Sometimes the edges get stretched and it isn't always the best measurement. 

IS YOUR QUILT SQUARE?

Before putting on any borders you need to determine if your quilt is square. That doesn't necessarily mean square as in the same on all sides but square in relation to the quilt being equal along the entire quilt. The best way to determine if your quilt top is square is to lay the quilt on a flat surface. Take the top and bottom edges and fold them into the center of the quilt. They should be the same measurement as the center. You need to do the same with the side borders. If they are not there are a couple things you can do. 

First, if the outside edges are slightly bigger than the center you can trim them down a little on each edge. A second option is to take in some of the seams on the blocks slightly across the quilt. Try to take in some seams on the right, middle, and left so that they are taken in evenly. The third option is, add the 3 different measurements (top, middle, and bottom) and divide by 3. This will be the measurement that you will use to determine your borders. The third option is the best option if the center is bigger than the outside edges.

WHAT SIZE DO I CUT MY BORDERS?

The center of this quilt is 30-1/2" square. The border strip is 3-1/2" (that includes the seams) wide. To determine what size strip you need for a mitered border you use this formula. Size of quilt plus 2 times the size of the finished border plus 4 to 6 inches. So for this border I would cut 4 strips that are 40" to 42" (30" + 6" + 6").

SEWING THE BORDERS ON

This is my method. You can certainly use a method that you have used that works for you. This works best for me with large quilts.

Step 1. Match the center of the quilt and border strip. Fold one right sides together and the other wrong sides together. This will create a small crease and they will fit inside each other.

Step 2. Mark 1/4" seam on all four corners of the back of the quilt.


Step 3. Measure from the center of the quilt to one edge. For this quilt it would be 15-1/4". Using a measuring tape measure 15-1/4" from the center of the border strip and make a small mark. Repeat on both edges.


Step 4. Match marks on border to the edges of the quilt top. Pin with the border on the bottom so you can see the 1/4" marks on the back of the quilt. Don't be stingy with the pins. It works best when you lay the quilt on a flat surface to pin them together. Always pin halfway between each pin set to get the borders to piece evenly.

Step 5. Starting at the 1/4" mark, backstitch or use your sewing machines knot function (I love that function on my machine) and sew to the 1/4" mark on the end and backstitch or knot. Repeat with all four border strips.

Step 6. Lay the quilt on a flat surface where you can press with an iron. Lay out the top border piece straight and the right side border piece across the top of it at a 90 degree angle.


Step 7. Fold the top border under creating a 45 degree angle. The two strips will be evenly on top of each other with right sides together. Check with a square ruler, with a 45 degree line on it lined up with the fold, to see if the edges of the border are at a 90 degree angle. This first attempt was not quite right yet as the edges of the ruler did not cover the edges of the border. (Look closely at the bottom right of the photo.)


Slightly manipulate the corners until you get a good 90 degree angle with the ruler. (See how the edge of the border now is at the edge of the ruler on the bottom right.)


Step 8. Press corner with a hot iron. Carefully fold corner down and place a small line of glue along the edge of the fold. Fold corner back up and press again with a hot iron. Repeat on all 4 corners.


Step 9. Fold quilt in half diagonally and trim seam to 1/4". Now you are probably saying "Why didn't we just do this instead of all those other steps?" This certainly does work some of the time but I don't always know if I will end up with a 90 degree corner when I do just this step. You can fold the quilt in half diagonally, take a long ruler and draw a line through the border strips even with the fold of the quilt and use that as your stitching line.


Step 10. Sew the corner seams with a 1/4" seam, backstitching or knotting at the intersection where the seams come together. Make sure that you don't catch the seams from the borders in the stitch line. Press seams to one side or release the glue and press seams open. Trim dog ears off corner.


Here is what my top looks like with the mitered border. If I had had more time and more border stripe I would have worked harder at trying to get the corners to match. By some miracle one of them matched almost perfectly without me even trying!


I didn't have time to piece the rest of the quilt but did lay it out. I made a couple changes to my original design (designer's privilege)! I saw one of the settings in the Facebook posts that I liked and decided I didn't want to take the time to match all those triangle seams in Block 1! I also changed blocks 2 and 3. On block 3 I didn't have enough of the red fabric so I had to use a different one. On block 2 I decided to use the fabric I used in the center medallion because I have a design rule that I don't use a fabric just once in a quilt (just one of my own design rules). So here is what my quilt will look like. Now to finish piecing it and putting on the last two borders. Don't forget to measure again each time you put on your borders.


MAKING ADJUSTMENTS 

Okay, now you are ready to sew the blocks to your quilt. You sew your four blocks together and they aren't the same size as your quilt top. With this new inner border your quilt now measures 36-1/2". The four 9" blocks sewn together should equal 36-1/2" and they don't! Don't fret. Is your measurement larger than 36-1/2"? Easy fix. Take in some of the seams just a fraction (I took them in a stitch width or just moved my needle to the left one click.) Is the measurement too small? Take out the seams just a little.

What if the center medallion is not 30-1/2" so when you sew your borders on they it will be too small? You have a couple options. First sew your four blocks together and measure them. If they equal the measurement of your center plus the 6" (don't forget your seam allowance of 1/2") then you don't need to do anything. Chances are all of your blocks will be slightly smaller so they should work out. 

If your blocks sewn together equal 36-1/2" and your center medallion is too small then you need to make your borders slightly larger to equal the width of the blocks. There are always ways to make some type of adjustments to get things to fit together.

NEW DRAWING AND WINNERS

This week's winners are Jean Squires, Ann Fitzmorris, and Kathy Onarheim. They each won my 1/4" seam guide with a trimmer. Please send me your address so I can mail one to you. Congrats ladies. This week I will again choose 2 winners to win a pdf of any one of my patterns. This includes my international followers so don't forget to leave a message and your contact information. Good luck!

I still have some wonderful fabrics in my End of the Bolt sale so be sure to take a look. They are only $5 a yard for the remainder of the bolts. END OF BOLT SALE. I will be having a Black Friday sale next week so be sure to read my blog and find out about some fantastic deals!

My Phoenix Rising pattern is now available in in both printed and pdf format. You can use my Helix acrylic templates to make the quilt.


NATIONAL QUILTER'S CIRCLE


National Quilter's Circle is offering a great special on their membership. For only $25 you can get a Gold membership and get free classes and free downloads for a year! Use this link to get the special price and please use this code "TOBY25" when checking out. I want to say that I do get a bonus if you use my code.


I will have a separate blog for block 4. As always, do what you love and love what you do. Thanks for reading and be sure to share with your quilting friends.