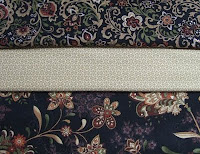
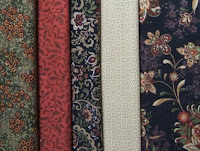
Sorry for the missing posts. Things get pretty hectic for me before Quilt Market and I have deadlines to meet. I thought I'd start by giving you a sneak preview of a couple of the blocks of a quilt that will be in McCalls Quilting magazine in the spring of next year. The fabric collection is Paula Nadelstern's Nuance by Benartex (http://www.benartex.com/). It is made with one of my favorite blocks, New York Beauty. Both the center quarter circle and the background fabrics are fussy-cut. For those that do not know what that term means, it is cutting a fabric in the same place for each similar section to create a kaleidoscope look. You can also get this from a popular technique called "Stack 'n Whack" but I like to use templates and a set of mirrors to plan what it will look like.
I prefer to fussy-cut the matching sections using templates instead of stack n cut because I am very particular about how the blocks should look. I don't like the randomness (if that is a word) of what you get when you stack the fabric. I use a set of mirrors by Marti Michell and my own acrylic templates to get the effect I want. Of course you can make your own set of templates with template plastic.
I like using fabrics that are symmetrical like this one because when I place the mirror on the center of the fabric pattern, I see exactly what effect I will get when I sew the sections together. Symmetrical means that if you draw a line down the center of a pattern, the left and right sides are exactly the same. The background fabric was a stripe so I had to cut a left and right orientation of the design to get the mirror effect. So, how do I get a perfect match each time? I've tried drawing registration marks on my templates but that didn't work for me.
 There are a couple tricks. One reason most people do not like templates is because they never stay in place when you are trying to cut out the fabric. The first trick is to place some rolled up scotch tape on the back of the template. This holds onto the fabric well. Cut your first repeat with your rotary cutter. I use the 18mm size because it does not cut into areas that I might use for another block.
 Now here is the second trick and the way each cut is a perfect replica of the original; leave the first cut on the template! Take the template with the fabric on it, find the next repeat, place the template and move it around the fabric until it disappears and is exactly on the original design. I check all the way around the template to check the edges. I continue doing this with the original cut until all of the repeats are cut out.
 The background of the block was created from a stripe and I wanted to create a mirror image with the two sections (left and right) so after cutting out the first repeat, I had to turn the template upside down and cut the mirror image by matching the design on the back of the fabric to the front of the fabric. Because I cut the same place on all of the background pieces, I kept the left and right sections on the template, so I had a guide for both cuts, until all of my background pieces were cut.
If you have never tried fussy-cutting you should try this method. You can use it for squares, triangles, or eight point stars. If you really want to experiment, try other shapes. There are no rules. Once you try it you might get hooked on it like me. I specifically purchase fabrics so that I can see what kaleidoscope effects I can make.
For more information regarding choosing fabrics, making templates, and fussy-cutting along with 9 wonderful quilts, check out my book, St. Louis Stars, published by Kansas City Star Quilts, available on my website, http://www.gatewayquiltsnstuff.com/. Templates and Marti Michell's mirrors for this block are also available.
Everyday, do what you love and love what you do. 'Til next time, Toby


