Search This Blog

Showing posts with label #tobylischko #fussycutting. Show all posts

Friday, April 20, 2018

STATE BLOCK CHALLENGE INDIANA BLOCK 1

Sometimes simple is better. I have been doing these time intensive projects and needed to take a break and do one of my state blocks. This block is super easy. It only took me 30 minutes from cutting to completing the block.

Here is what the block looks like without fabrics.
Here are the fabrics I picked.

Here are the pieces cut.
CUTTING INSTRUCTIONS

Fabric 1 Main fabric
* Fussy-cut (4) Template B. (MM B9)
Fabric 2 (pink)
* Cut (8) Template A (MM B12)
or Cut (8) 2-1/2" squares
* Cut (1) Template C (MM B8)
or Cut (1) 4-1/2" square
Fabric 3 (yellow)
* Cut (8) Template A
or Cut (8) 2-1/2" squares
Fabric 4 (light)
* Cut (4) Template B
or Cut (2) 4-7/8" squares and cut each twice diagonally into (4) HST.

PIECING INSTRUCTIONS
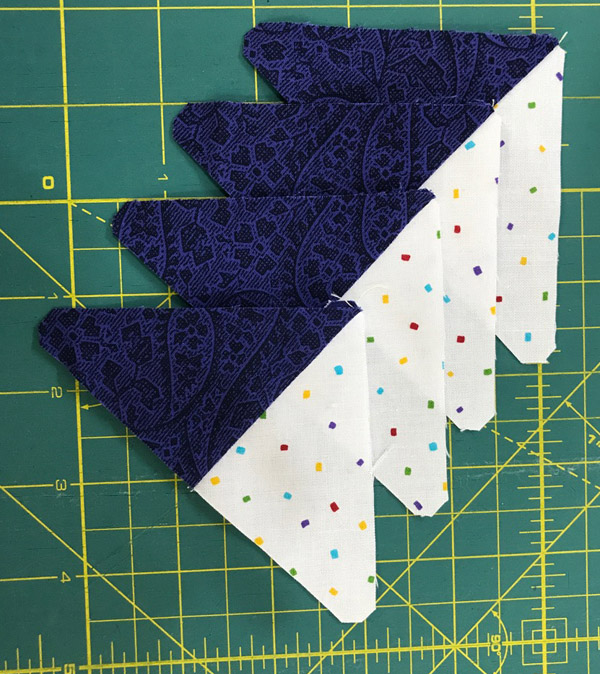
1. Sew a four-patch with the Template A Fabric 2 and Fabric 3 patches. Make 4.
2. Sew the HST Template B Fabric 1 and Fabric 4 together. Make 4. Press to darker fabric.
3. Sew the (4) four-patch, (4) HST units, and Template C square together. Press towards the four patches and the center square.
Finished block.
Can't get much easier than that! I love the play of the fussy cut pieces and the background fabric. Creates a very interesting effect.

Here is the link to the templates.

Take advantage of my spring cleaning sale on my website. All pink, purple, green, and yellow fabrics 25% off. Write "springcleaning" in the coupon box when checking out for the discount. Search by color to get to the fabric you want quickly.

As always: Do what you love and love what you do. Thanks for reading. Feel free to share with your friends. I would love any comments to see if you are participating or plan to participate.

2 Weeks Of Craftsy Unlimited For Just $1 at Craftsy.com 4/18-4/24/18.
One (1) redemption per email address 4/18/2018 12:01AM Mountain Time through 4/24/2018 11:59PM Mountain Time. You will be charged $1 upon sign-up and be granted access to Craftsy Unlimited for 14 days. At the end of 14 days, if you have not canceled your subscription, it will renew automatically at the regular rate for the plan selected upon checkout. (Regular rates in USD are $14.99 per month or $120 per year. Rates for subscriptions priced in other currencies vary and will be presented at the time of sign-up). $1 for 2 weeks offer is in US Dollars. This offer is only valid for new subscribers. One (1) redemption per email address. Offer cannot be combined with other offers. You can cancel at any time, but your monthly or annual subscription will remain active for the full term and prorated refunds will not be offered. Craftsy may end or alter this offer at its discretion.


Fat Quarter Shop Basic of the Month Sale

Saturday, February 3, 2018

STATE BLOCK CHALLENGE HAWAII BLOCK 1

Well the groundhog did not see his shadow on Friday so that tells us there will be six more weeks of winter. Just gives me more excuses to stay inside and quilt! 

The first two blocks from Georgia were send to me by Jeannie S. Way to go Jeannie!

  
After making Georgia blocks 1 and 2 and writing the directions, I decided to devote each blog to writing the directions for one at a time. It makes for not so long of a blog and you can concentrate on making the blocks one at a time. If you want to make only one but aren't sure which one you want to make, then you can wait to see the next one which I will post in a couple days.

Both Hawaii blocks have quite a few pieces in them. It is difficult to say which one was harder. Block two has more odd shapes, but sewing either of them together is not difficult. Today's block has 65 pieces! With all of those pieces I can't stress how important that accurate 1/4" seam is. If you struggle with that consistent seam and you don't have my "Perfect 1/4" Seam Guide" then you might want to think about purchasing it. I have a Youtube video on how to use it. If you haven't seen it yet you can view it here:


Also since all of these blocks are 12" finished blocks, you can use Marti Michell's Template sets A and B for some of the shapes. I also carry those on my website. Set A / Set B. If I use them with any of the blocks I will tell you which ones work with the block.

Hawaii block 1 looks like this without fussy cutting the pieces.


Here are the fabrics I picked for the block.


Here are the templates I made (or used Marti Michell's). Remember to draw a center line on the ones that you want to use for fussy cutting. If you don't want to make templates for the triangles or squares, you can use the patch size cutting instructions.


Here are all the patches cut out!


BLOCK CUTTING INSTRUCTIONS. (QST=quarter-square triangles, HST=half-square triangles) Marti Michell templates = MM. When cutting the HST or QST be sure to follow the straight-of-grain line on the templates.

Fabric 1 Main Print
* Fussy cut four (4) Template G (MM A3)
* Fussy cut one (1) Template H (MM B10)
Fabric 2 Light
* Cut eight (8) Template C or cut two (2) 4-1/4" squares and sub-cut twice diagonally into eight (8) QST.
* Cut eight (8) Template B (MM D29) or cut four (4) 1-7/8" squares and sub-cut once diagonally into eight (8) HST.
Fabric 3 Light blue
* Cut eight (8) Template C or cut two (2) 4-1/4" squares and sub-cut twice diagonally into eight (8) QST.
* Cut eight (8) Template A (MM B12) or cut eight (8) 2-1/2" squares.
* Cut four (4) Template F (MM B14) or cut one (1) 3-1/4" square and sub-cut twice diagonally into four (4) QST.
Fabric 4 Dark purple
* Cut eight (8) Template C or cut two (2) 4-1/4" squares and sub-cut twice diagonally into eight (8) QST.
* Cut eight (8) Template F or cut two (2) 3-1/4" square and sub-cut twice diagonally into eight (8) QST.
Fabric 5 Red
* With fabric folded wrong sides together cut four (4) Template D. You will get a right and left section at the same time.
* With fabric folded wrong sides together cut four (4) Template E. You will get a right and left section at the same time.

PIECING INSTRUCTIONS

Corner units
Step 1. Sew a Fabric 2 Template B HST to each diagonal corner of both Template D and Template E patches. Press to red. You should have 4 right and 4 left of Template D and Template E sections.


Step 2. Sew the pieced Template E patches to the sides of the Fabric 3 Template A squares as illustrated. Press to squares.
 

Step 3. Sew the pieced Template D patches to the other side of the squares as illustrated. Press to Template D. They should equal 3-1/2" square.


Edge units
Step 4. Sew a Fabric 3 Template C QST and Fabric 4 Template C QST together. Press to Fabric 4. Make 4. 


Step 5. Sew a Fabric 2 Template C QST and Fabric 3 Template C QST to each side of a Fabric 1 Template G. Make sure to make the fussy cut piece facing in the correct direction. Press to Fabric 1. Make 4.


Step 6. Sew Sew a Fabric 1 Template C QST and Fabric 4 Template C QST together. Press to Fabric 4. Make 4. 


Step 7. Sew the units together, matching seams. Make 4. The unit should equal 3-1/2" x 6-1/2".


Center unit
Step 8. Sew a Fabric 4 Template F QST to each side of a Fabric 3 Template A square. Press to Fabric 4. Make 4.


Step 9. Sew a Fabric 3 Template F QST to each side of the pieced unit from step 8. Press to Fabric 3. Make 2.


Step 10. Sew the units from step 8 to each side of the Fabric 1 Template H square. Press to fabric 1.


Step 11. Sew the units from step 9 to each side. Press to corner units.The center unit should equal 6-1/2" square.


Putting sections together
Step 12. Layout the 4 Corner units, 4 Edge units and Center unit together as shown. Sew across each row. Press rows 1 and 3 to corners and row 2 to center. Sew rows together. Press seams out.


Here is the link to the templates. Hawaii block 1.

As always: Do what you love and love what you do. Feel free to share this blog with your friends and please leave a comment if you like it. If you have any questions about the directions or if I made a mistake, use my contact form to let me know. Thanks for reading. Toby 

Friday, January 19, 2018

STATE BLOCK CHALLENGE - GEORGIA


WELCOME OR WELCOME BACK!!!
 
This is not just for those who were following my state block challenge last year but for anyone wanting to participate. You can either start here or if you want to go back to previous blogs to see the other blocks and do them that is fine. The only rule in this challenge are that you fussy cut some part of the block. You can do one or all of them, choose certain ones you like, skip some, it makes no difference. I do hope that when you do get the blocks done you will send me the images of them, I love to share them on my social media pages. I will be talking about how to take good pictures of them when the time comes. I will also be having occasional prize drawings to encourage you to finish them. 

I am going to add a special incentive to those who will be doing this for the first time .... you will receive my Perfect 1/4" seam guide to help you get that consistent 1/4" seam allowance. So if you will be participating for the first time, email me with your address using the Contact form on the left side of this blog so I can mail it to you.

I ended on Florida last year so now I am on Georgia. The only two blocks I could find of that state were very similar. As in my previous challenges I try to do an easy block and a difficult block. Here is what the two blocks look like (with no fabric in them). This time I will be posting blank blocks instead of showing what my finished blocks look like. That way you will not be influenced by where I put my fussy cut patches.


Now it is time to gather your fabrics. I chose two symmetrical fabrics with a dark and light background. These fabrics are from the Imperial Paisley collection with Quilting Treasures. They are both available on my website.  Click on the names to take you to them. You should get at least 1-1/2 yards of two different symmetrical fabrics or 2-1/2 yards of one symmetrical fabric. You don't have to use them for all of the rest of the blocks but you want to make sure you have enough for at least 16-20 blocks. Also pick a fabric with lots of colors.

   Set Paisley Navy                                   Set Paisley White
Here are the fabrics I chose to go with them. I can always add more if I need to but this is a good start. Your coordinating fabrics should be tone-on-tones, batiks, or solids. Start with 1/4 yard or fat quarter of each. If you have some scraps that go with them, then use those. This is a very scrappy quilt so the more fabrics you use the better. The blocks' focal point should be the fussy cut patches so don't choose fabrics that will "fight" with the symmetrical ones.


You will need to print out the templates so you can cut your pieces. I am including the templates in this post so you can get them cut out ahead of time. Be sure to use heavy template plastic. The best way to make them is to cut around the paper template. Tape them to the template material and then cut them out. That way you don't have to trace them and it will give you a more accurate template.

In the next post I will be showing you the fabrics I used in each block, the sizes of the pieces to cut and the sewing instructions. When you print out the template PDFs be sure to print at no scaling or at 100%. To check on the scale, the corner squares on both blocks should equal 3" to the outer edges or 2-1/2" on the inside lines. Please let me know if you are having problems printing the correct scale.

Click on the links and when prompted, save the file in a folder with the title State Block challenge. If you have any problems getting the PDFs please contact me on my Contact form on the left and send me your email. I can email them to you directly then.


So gather your fabrics, print and cut out your templates and start to think about where you will put those fussy cut pieces in the blocks. 

As always, Do what you love and love what you do. Please feel free to add any comments and share my blog with anyone that might be interested.


Monday, October 31, 2016

STATE BLOCK CHALLENGE COLORADO 6A AND B

First I want to thank everyone for their patience with my postings. I did not realize how time consuming doing this challenge would be! It is good though because it does force me to write my blog more often. Also thank you to those who sympathized with my loss. Every pet owner knows what that is like and how it affects us.

First to the winners of the Arizona blocks. 

Mary Steimle won again with her wonderful Block 4A. Her use of fabrics is amazing!


Block 4B was won by Rosemary Krupski. She is using a Tula Pink fabric collection and really knows how to use them.


The state this week is Colorado. I had quite a time looking for blocks for this state! I found one but that second one was more difficult to find. Neither of the blocks were very difficult so if you don't do both blocks each week, either block should not be a problem to do. The more blocks you make the more you will be using some of the same size templates. So check with your previous templates to see if you already have one the same size as in the new blocks.

I hope more of you send me your finished blocks. I started getting quite a few at first and now it is down to only 3 per block. Remember you will get a chance to win one of my pattern downloads if yours is picked. Don't ever think that it is not good enough. You never know if your block will be picked. If you would prefer that I randomly pick a winner instead of a vote, I will be happy to do that in case you are too intimidated to enter yours. I will hold off picking a winner for Blocks 5A and 5B until Wednesday so I can get more entries.

BLOCK 6A


For this block I chose only the focus fabric and a light background. The whole block is made up of only half-square triangles. I cut two different areas in my focus fabric for the opposite sides of the block. It is difficult to see but if you look close you will see an orange flower and a blue flower. You can cut them all the same or two different areas. The inside pinwheel had to be cut in a different way in order for them to match the other triangles and I will show how to do that in the following illustrations. You do not have to be this fussy if you do not want to.

CUTTING INSTRUCTIONS


Fabric 1 Focus fabric with Template A:
*Fussy cut either (16) of the same designs  OR
*Fussy cut (8) each of two different designs OR
*Fussy cut (6) each of two different designs and (2) each of coordinating designs.
Fabric 2 light background:
*Cut (16) Template A OR (8) 3-7/8" squares cut once diagonally into (16) HST.

To figure out how to cut the inside pinwheel pieces I laid the original cut piece on top of the template as illustrated:

Here is what the original cut looks like:


Here is what I did with that piece to determine how to cut the pinwheel section:
Can you see how I put the original triangle on the template sideways to match the fabric design underneath? You have to look really close.


Here is the resulting placement for the cut:


Background fabric with Template A:
*Cut (16) triangles.

PIECING INSTRUCTIONS

1. Make (16) Half-square triangle squares. You will press (6) of the regular cut squares to the background fabric and the remaining squares to the focus fabric.


2. Layout the half-square triangle squares following the illustration paying attention to the pressing of the triangles.

3. Sew sections together. Press rows in opposite directions.
4. Sew rows together. Press the top and bottom seams to the center and the center seam in either direction.

BLOCK 6B


For this block I chose two different colors of the focus fabric flowers, a light background, and two different dark fabrics. You could use the same dark fabric for the center as you did for the strips sets and you can cut the same area for all of the quarter-square triangles.

CUTTING INSTRUCTIONS
You will only need to make a template for the quarter-square triangles, but of course you can make them for all the patches. I include cutting with or without the templates. 


Fabric 1 Focus fabric:
*With template A fussy cut (8) each of two different designs or (16) of one design.
Fabric 2 light: 
*Cut (8) template B OR (8) 4-1/2" x 1-3/4" rectangles.
Fabric 3 dark #1:
*Cut (4) template C OR (4) 4-1/2" x 2" rectangles.
Fabric 4 dark #2
*Cut (1) template D OR (4) 4-1/2" x 4-1/2" square.

PIECING INSTRUCTIONS.

1. Sew the quarter-square triangles together. Make (4).


2. Sew a 4-1/2" x 1-3/4" Fabric 2 to each side of a 4-1/2" x 2" Fabric 3 strip. Press to dark fabric. Make (4).


3. Layout the four quarter-square triangle sections, four strip sections, and the 4-1/2" Fabric 4 square as illustrated.


4. Sew sections across. Press to strip sets.
5. Sew rows together. Press to center.

Here are the templates for the two blocks. Click on the links. Then save the files to your folder and open with Acrobat Reader. Check the 1" box to make sure that the scale is correct after printing with "no scale" or at 100%. The lines on the templates are fairly thick so check to see if you need to cut them out on or in the lines.

Block 6A
Block 6B