Spring has sprung!
This last winter was the dreariest winter ever! I don't think the sun shone most of it. When my trees started blooming (Red Bud, Lilac, Fire Bush) I was so excited I just had to take photos. During my walk with the dogs I also found some little wildflowers and my Flags are just starting to bloom. My poor Daffodils didn't make it with the cold snap.


It was so nice to finally see some color! I live in a rural area with woods all around me so all I have seen all winter is bare trees and brown grass and plants.
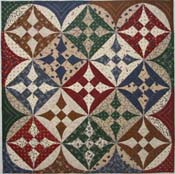
National Quilter's Circle Baskets and Blooms

Speaking of flowers, I apologize for not writing a blog for the first week. Despite being stuck in the house, I would think I had a lot of time to quilt but life just gets in the way. So, for those new to this I will post some of my tips. For those who have already seen these tips, please have patience.
I can't stress how important a consistent 1/4" seam is when you are sewing a lot of seams in a block. I use an "exact" 1/4" because I don't know what a "scant" means. It means a lot of different things to different quilters. If I set my seam right, everything goes together so well. I have a YouTube video on how I do this with my 1/4" seam guide.
I also want to mention the importance of good quilting tools. The right pins are important. I used to sew clothing (ancient history) and I still have some of those pins I used back then. I call them nails! Today's fabrics are so much better than they were years ago. Good fine pins are essential! You can't always tell about the pin on the cover of the package. Be sure it says how wide the pin is (not the length). A .5mm or .4mm is the best. The smaller is better for batiks because they have such a tight weave. I carry them on my website.
Pressing is also important. Now Ashley and I differ when it comes to pressing. She likes to use a lot of steam on her seams. We both finger press before pressing with an iron, but I don't use water until I finish my block and I use a spray bottle so the steam in my iron doesn't leave any residue on my fabrics, just in case it decides to spit brown! Either way works. You do what works for you. Just be sure not to "iron" your seams (back and forth motion). If you do, especially with steam you will distort them. Pressing is an up and down motion.
There is always that controversy with whether to press your seams open or to the side. I do both depending on what kind of block it is and how many seams intersect. For most of these blocks you will press to the side in the direction the instructions give you. Again that is a personal preference. If you do a lot of in-the-ditch quilting, you will want to press to the side.
So far you have been given 6 blocks.


Most of the blocks in this quilt have half-square triangles (HST). I wrote in my general instructions that there are many ways to make them. Most quilters like to cut the squares, draw a line down the center and sew 1/4" on each side of the line. Then trim to the size listed. That method is fine. I don't like taking the time to draw the line so I just cut them in half diagonally with the pair of fabrics right sides together so they are ready to sew. Sewing along a bias edge is not hard. You just have to make sure you don't stretch your seams as you sew. Just let the machine do the work. Since the squares are overcoat (cut a little large than needed) you can still trim them down to the size required.
I'm looking forward to seeing everyone's blocks and the fabrics you pick. Quilter's are so creative. Also don't feel obligated to sew the quilt exactly like I did. Of course the on-point setting has to be unless you want tilted blocks!
If you haven't gotten a chance to sign up yet, go to: National Quilter's Circle Baskets and Blooms Challenge.
GIVEAWAY
Just to add a little extra to this post, I will be giving away my 1/4" seam guide to the first 10 that respond to this blog. If you already have one please allow other quilters get a chance to get one. Then after 10 responses you can post a comment. I will also draw a name for a chance to win my cutting corners template set. Be sure to leave an email address for me to contact you. This is for the U.S. quilters only since shipping overseas is so expensive, even for a small item (sorry).
Thank you for reading and remember: Always do what you love and love what you do. Toby Lischko