I had such a wonderful response to my Frosty pattern! I sent a copy to all who supplied me with contact information. If you are reading this and did not get a copy of the pattern, please send your contact information to info@gatewayquiltsnstuff.com so I can send one to you.
The winner of Monday's drawing is Mary Ellen Futch. Congrats Mary! I will send you the fabric bundle and my Geese on the Loose pattern.
I had said that I would post my method for foundation piecing in this blog. I love to paper piece (or foundation piece) because of the wonderful accuracy, but I don't like tearing off all of that paper when I am done. I have a friend, Dolores, who helps me piece quilts for magazines and I usually give her the foundation sections to piece because she is so quick. I was doing a pineapple block and when she was done, I didn't want to pay her to just tear paper off so I did it. It took me 10 hours to tear off all of the paper! After that I thought there had to be a better way. I'm not sure whether I came up with this method first, but I know I definitely like it better than the alternative!
What it involves is instead of using tracing paper or foundation paper, I use freezer paper. You can use the large rolls that you can purchase at the grocery store or you can purchase 8-1/2" x 11" sheets here: Freezer paper.tofrombuy=QuiltingSupplies||||1&p=2.

All of my patterns that have foundation piecing in them include a CD with tips for sewing plus the PDF of the foundation section so you can print it with your home printer. Here is what the quilt looks like. I designed this pattern for the Hoffman Challenge. It traveled with one of the groups and it has also won many ribbons. This is a popular workshop that I teach.

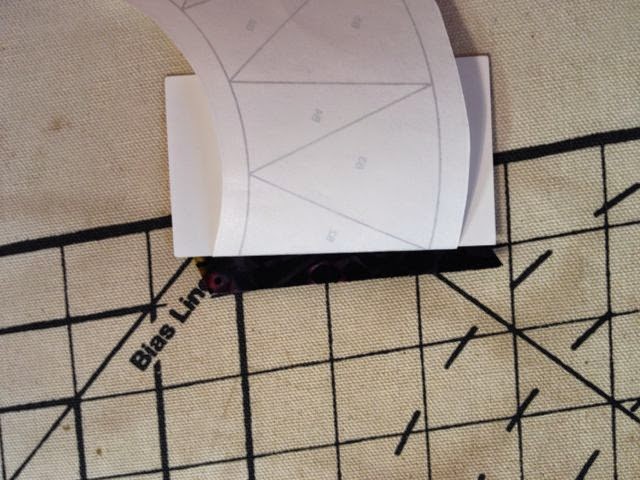
Here is what the foundation section looks like, on one section, printed on the freezer paper.

I printed on the paper side (not shiny side). Also with all of my foundation patterns I have designed a set of acrylic templates to use either for traditional piecing or for foundation piecing. I like to use templates because I have very little waste when I sew and I like to use the correct shape for the section so that I don't make a mistake and sew a patch that either doesn't fill the space or is turned in a wrong direction. This is what the templates look like. I include a couple extra templates, which I will explain their use later in the blog. You can find the templates here: Geese on the Loose templates.

I use the small templates for cutting out the pieces for foundation piecing. Since the templates include the 1/4' seam allowance and I need slightly larger pieces for the foundation piecing, I use an Add-a-Quarter ruler to add an extra 1/4" around the entire template.
Start by cutting a strip 1/2" larger than the template and use an Add-a-quarter ruler to add an extra 1/4" around the template so I have enough fabric for the sections.
When using the freezer paper you do not have to sew on the paper. Here are the steps to using it.
Step 1: Press the first fabric wrong side of the fabric to the shiny side of the paper.

Step 2: Fold the paper back (I used my business card) on the line between #1 and #2. The line should show just next to the card.

Step 3: Trim the fabric to 1/4" using the Add-a-quarter ruler.
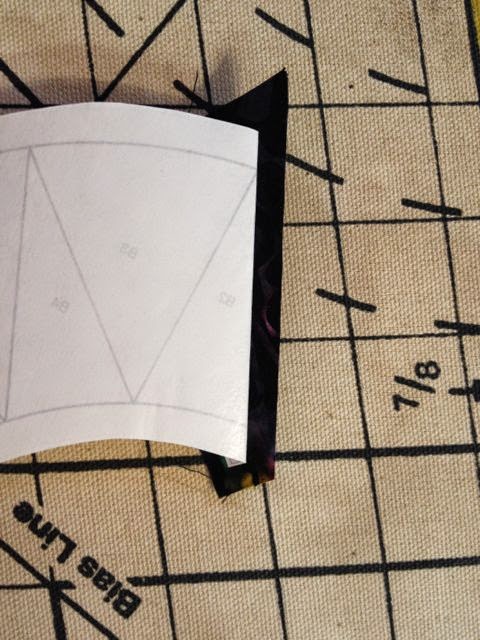
Step 4: Place the second fabric, right sides together, lined up with the cut edge. Make sure there is a little fabric hanging over each edge and that the triangle is pointing in the direction that you see through the top of the paper.

Step 5: Sew ALONG the edge of the fold of the freezer paper, NOT on the paper.

Step 6: Finger press the fabric over and then press with an iron to the line between #2 and #3 sections.

Repeat steps 2 through 6 until you have the whole section finished.


My template sets have extra templates that are used to trim the section to the exact size you need to sew in the block. Peel the freezer paper off the pieced section and using the template, (place some rolled up tape on the back to keep it from sliding around) line it up on the points of the pieced section making sure that they are within the seam allowance. Trim around the template and your section is ready to sew!


Doesn't that look wonderful! No paper to tear off and the freezer paper is ready to go to make another section. I like to string piece 5 to 10 sections one right after the other as I sew on each section. That way they go together faster and I feel I have accomplished something when I get a group done!
I need to get back to awarding fabric bundles so here is the next fabric bundle from P&B that is up for grabs. It is another group from the Suede group. Please leave a comment as to what you think you might do with it. When I post the winner, I will show what I decided to do with it.

REMEMBER, I CAN NOT SEND YOU A MESSAGE IF YOU WON IF YOU DO NOT LEAVE YOUR EMAIL ADDRESS. DON'T MISS OUT. While you are leaving a message tell me what paper pieced pattern you have been wanting to do but have avoided because you didn't want to do all that work.
In closing; Always do what you love and love what you do. Toby Lischko