BLOCKS 2 AND 3


Don't sew when you are tired!
I was recently diagnosed with Fibromyagia. Those who are not familiar with the disease, some of the symptoms are fatigue and Fibro-Fog. You know what the first one means, the second symptom means what it sounds like. I am constantly in a fog. I forget things easily (walk into a room and forget what I went there for, well some of that can be due to age!), I get easily distracted, I forget what someone tells me seconds after they tell me, and it is difficult to concentrate. I know some of you will tell me that you have those too if you are over 65!
The other symptom (fatigue) causes me to be tired all the time. I can fall asleep anywhere; in front of my computer, my sewing machine, and the tv. I could sleep 12 hours and still be tired. There are other symptoms but they are being somewhat controlled with medication.
I started the day getting up early for an eye appointment. I had planned when I got home to work on a couple new versions of block 2. I had felt tired even when I got up so I knew it was going to be a bad day. Well, when I got home I sat on the couch catching up on emails and I fell asleep. I woke up in time to eat lunch and my husband had some things to do outside so I sat down in front of the tv and fell asleep again! Well this went on all afternoon. Finally I got a chance to sew after dinner.
I will proceed to show you what happened when I tried to sew this block together. I don't mind telling you that I make mistakes when I quilt but these were doozies!
SEWING BLOCK 2 USING TEMPLATES
I don't have to stress how important it is to have an accurate 1/4" seam allowance when piecing with the templates. Use your best method for getting a consistent 1/4". I talked about how I do it in earlier blogs but just in case you haven't seen it, you can check out my Youtube video. You can purchase my Accurate 1/4" Seam guide here: Seam guide.
When you cut out the pieces, with the templates, make sure you place the correct fabric on top and make sure that the templates are face up. It helps to write the letter of the template and number of the block on the top of the templates.
Lay three of the pieces (right or left side) in the block looking at the image of the block in the instructions. Template B looks like the two opposite sides are the same size but they are actually slightly different. Also A and C are similar, but one is slightly bigger than the other, so be sure to keep them separate with the correct labeled template.
It is easy to get them mixed up, but when you put them next to A or C you will see that the edges do not line up. Here is what I did.

It is easy to get them mixed up, but when you put them next to A or C you will see that the edges do not line up. Here is what I did.

I looked at it and didn't think it seemed right but the edges of B line up with the edges of A and C so I figured it had to be right. I wanted you to see what it looks like if B is in the wrong direction. Remember, this is suppose to make a right triangle (a triangle with a 90º angle).


So I thought maybe if I sew them together it will look right. So I sewed the 3 pieces together and laid them on the edge of my table. I noticed that the seam dipped at the point but again I thought, maybe sewing the two halves together will fix that. It made a triangle!


So I sewed the two halves together. I knew it definitely didn't look right. It wasn't even square! So I tried to figure out what I did wrong. (I got really friendly with "Jack".)


As I said, my brain is constantly in a fog so, I really couldn't figure out what I was doing wrong. I was looking at the image of the block (was I seeing it correctly?) and my pieces and I was getting very frustrated! So my last resort was to get out the paper pieced section and place my pieces on top of it. The light bulb went on! I was placing the B template backwards! That's why the edges still matched.


To make sure that I was piecing it correctly from this point forward, I folded down A on top of B, pinned and sewed them together.

I laid it back onto the paper and then folded it down over C, pinned and sewed them together.

I repeated with the other half.

Then I could chain stitch the other sections to make it go faster. Make sure you piece from A to C pressing to C on the right side and from C to A pressing to A on the left side.
Here are some images for sewing the pieces together and where to match the tops, bottoms, and seams. The templates are made so that there is very little guessing when laying the pieces together. When matching seams I like to pull one side back to see if they match and then I pin on two sides.


And you should have a nice 1/4" seam allowance at the point.


To make sure that I was piecing it correctly from this point forward, I folded down A on top of B, pinned and sewed them together.

I laid it back onto the paper and then folded it down over C, pinned and sewed them together.

I repeated with the other half.

Then I could chain stitch the other sections to make it go faster. Make sure you piece from A to C pressing to C on the right side and from C to A pressing to A on the left side.
Here are some images for sewing the pieces together and where to match the tops, bottoms, and seams. The templates are made so that there is very little guessing when laying the pieces together. When matching seams I like to pull one side back to see if they match and then I pin on two sides.

MATCHING SEAMS

MATCHING POINTS


MATCHING CENTERS

Remember, the A piece is on the OUTSIDE of the block.
THIS

NOT THIS

I know they look similar but the A piece is skinnier than the C piece in this block. Isn't it amazing how everything works together when you put the pieces in the right direction! Here is the finished block.

Of course I had to fussy cut it. Not sure how much I like it. It will look better on-point.

Block 3 is very similar to block 1. The C template is a little skinnier and longer than the A template. Be sure to keep them separate and labeled. Here are some tips when piecing to check to see if you are placing the patches together correctly and your 1/4" seam is accurate.
Check your edges after you sew. They should be straight.

And you should have a nice 1/4" seam allowance at the point.

Here is one quarter of the block. A is on the top and left side. C is in the center. You can see that the C on this block is very close in size to the A but it is longer and skinnier.

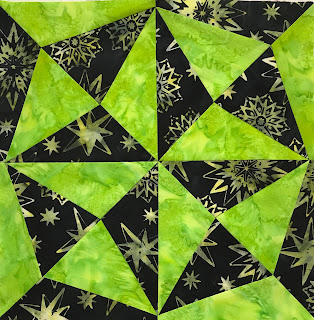
Here is my finished second version of block 3. I used some of my own dyed fabrics that I dyed over 20 years ago!

I haven't fussy cut it yet. But will post it when I do.
DRAWING WINNER
Congratulations to Robin Boehler! She won a batik bundle for leaving a comment. She said "Thank you Toby for sharing your design and your expertise." I will be giving away another bundle of batiks, so be sure to leave a comment and some way of contacting you (your email would be best). If you don't and I draw your name you will miss out on a prize.
I hope you get a chance to check out my website. I always have great deals on fabrics and I have some new kits and patterns. I will be posting the batiks used in my original design if there are any left over after this last shipment. I appreciate that you all have been so patient in getting the kits. They should all go out this week. Also if you belong to a quilt guild, I love to travel and teach. Feel free to pass on my information to your program chairperson.
As always: Do what you love and love what you do.