Search This Blog

Saturday, November 29, 2014

WINNER #3

I once read an article written by a well known quilter who said that she never tried to do curved piecing because she thought it was so hard. I thought she was doing a disservice to all quilters who were thinking of trying curved piecing because there are so many wonderful patterns that have curves in them. Your average quilter would read that article and think: "Since she thinks they are hard, I guess they are and I won't even try to do them".

Most of the workshops that I teach involve curves and I show quilters that they are not hard if you know how to piece them. There are many methods of teaching curves and tools to help. The Curve Master is one of them. Some people swear by it and says it works for them. Others tell you to use a bunch of pins or glue before sewing. Some say to put the convex (outy curve) on top and others say the concave (inny curve) on top. I am going to show you my method of sewing curves to give you perfect, no pleat, curves almost every time. The reason I say almost is because I don't think any method is completely fool proof. But, I can count on one hand how many times I have gotten pleats over the 20+ years I have been sewing curves. And, it is usually because I did not follow my own directions.

Since I will be giving away my Glorified Nine-Patch with a Twist pattern and template set, am using this block as my sample. Let me give you a few tips first. One: I always put the concave piece on top. That is the piece that will get a pleat in it and by putting it on the top, you can't always see if it will get a pleat before you sew it. Two: For gentle curves (like this block) you do not need to cut clips into the concave piece before sewing. My gauge is; if I can pull on the curve (on both ends) to try to straighten it out and it almost creates a flat edge, I don't need to clip the edge. Three: Pinning is the key. There is no need to pin it to death! I used to sew clothing and when I sewed in a sleeve and wanted it to lay nice and flat, I added LOTS of pins. I will show how to use only 4 pins to sew it. Four: Finger press before taking anything to the iron and use only a dry iron until the block is complete. I only add water when I finish a block to set it and make it nice and flat.

Let's begin to sew the block together. My template sets always include the seam allowance and the corners are trimmed so that all of the pieces fit together perfectly. Be sure to put some rolled up tape on the back to the templates so that they do not move around while you are cutting with the rotary cutter.

Step 1: Lay out the nine-patch. Pay attention to the direction of the center outer pieces so that the curved edges face out.


Step 2: Place the center pieces on top of the corresponding pieces, right sides together, to the left. I don't pin them, but you can. If I do pin them (usually because the fabric is stretchy), I pin them at the bottom part of the section so that the bottom edges stay together when stitching down the edge. Stitch one right after the other. Do not trim the threads. Finger press towards the dark fabric.


Step 3: Place the right pieces on top of the center pieces, right sides together, and stitch one set right after the other. Do not trim threads. Press towards dark.


Step 4: Fold top section down, right sides together, and match seams. The seams should butt right next to each other going in opposite directions. I put a pin in front of the seams to hold them together. Stitch across. Press seam up.


Step 5: Fold bottom section up, right sides together, and repeat step four. Press seam down.


Step 6: Crease the center of one edge of the nine-patch and the curved edge of the crescent piece. Tip, crease one with right sides together and the other with the back sides together. The creases will fit inside each other. Place the crescent piece on the bottom, curve and right side up. Place nine-patch, right sides together, on top. Pin at the center. I know it looks funny and doesn't look like the pieces will sew together. Pull the top ends to meet the bottom ends. All of the trimmed ends on the two pieces fit on top of each other.


Step 7: Pin the front end and the back end. This is very important. Because these are the edges that move while you are piecing, you need to weave the pin like you are sewing. This holds the edges together as you are sewing and won't twist when you begin and when you get to the end. I like to use Patchwork Pins by Clover that are 0.4mm wide (not long) that are available on my website. These are great pins that slide through the fabric like butter, especially batiks. I add one more pin. This one I weave at the back end of the strip along the seam allowance to create a "T" with the other pin. You can see it in this photo. The first pin is woven up through the two pieces (same on the front end) and the other pin is perpendicular to it and parallel to the seam line. You can also see that the ends of the bottom patch and top patch fit together perfectly.


Step 8: Sew a couple stitches, leaving the needle in the fabric, take the pin out and then grab the center of the block where the center pin is. This is another important step. Pull slightly on the center of the block where the pin is with your left hand. As you do this you can manipulate the fabric with your right hand so the bottom edge and top edge of the fabric are even. Sometimes you only have to do a minimal amount of manipulation. The edges will come together as you pull on the two fabrics. It is difficult to see here because of the dark sewing machine, but if you look carefully the edges are even as I tug slightly on the fabric. Do not "stretch" the fabric too much. A slight tug is enough.


Step 9: As you stitch down the edge, keep a slight tug on the fabric to keep the edges together. Stop sewing at the center pin and with the needle down, remove the center pin. Grab the end of the strip and repeat the tug pulling and continue stitching until the pin pointing towards the foot reaches the edge of the foot. Put your finger on the ball end of the pin and hold it down as you are stitching. The pin will come out as you are sewing. I place my left hand on the other pin to keep the edges of the fabric touching my mole foam (1/4" seam aid). (I couldn't show my left hand holding the pin because it was holding the camera!) If there is any time that it looks like you might get a pleat, simply put your needle down, lift the pressure foot and pull the fabric straight back to straighten it out and then continue to sew. Press towards crescent shape.


Step 10: Repeat this with the opposite end of the nine-patch.


Step 11: Sew the other two crescent pieces on repeating the above process. Start stitching with the needle to the right of the the previous seam line, barely touching it.


Here is what the front and back of the block will look like.


The edges of the block may not be straight so I trim the block to square it up. If you do this, do not do it until all of your blocks are done so you can see what the smallest measurement is. This block was created with my 6" template set so I trimmed mine to 6-1/4" instead of 6-1/2". Place a square ruler so that the 45 degree line goes through the middle of the block and the 6-1/4" marks are on the top left and bottom right corners. Trim off right and top edges.


Turn the block around, place the 6-1/4" lines along the two trimmed edges and trim the remaining edges. You will have a very nice square block.


I hope you will try sewing curves using my method. Please let me know when you do and share your experience. I will post your project on my Pinterest and Facebook page. If you have any questions, do not hesitate to write me.

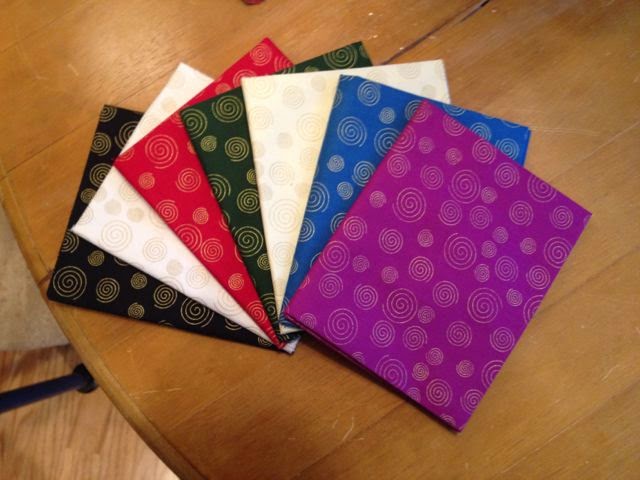
Now for the winner of this template set and the fat quarter bundle. Congratulation Leona! Please send me your address so I can put your prize in the mail. Here is the bundle you won with my pattern and 4" template set.


I have realized that some people who find out about my blog on Facebook have not been able to post in my comment section at the end of the blog. If you try to do this and for some reason can not, leave a comment on my Facebook page where you saw this notice and you will still be eligible to be in the drawing.

Here is a sneak peek of the next drawing.


This is another group of fabrics of the Bella Suede collection from P&B Textiles. I sure hope that the winners of all of these fat quarters will personally write to P&B to thank them for donating such wonderful fabrics! You can either do it on the P&B Textiles Facebook page or through the contact page on their website P&B Textiles. The bottom fabric is brown and the middle fabric is light grey.

Watch for my next blog as I show you how I used this fat quarter bundle in one of my patterns. As always, do what you love and love what you do. Thanks for reading. Toby Lischko


Wednesday, November 26, 2014

BLOG DRAWING #3

Sorry for the delay. Being confined to the house one would think I had more time to do my blog, but I have had a surge in working with different companies designing quilts for their new fabric collections. As soon as they come out as free patterns, I will let you know so you can take advantage of the free downloads.

Yesterday I got a phone call from a Special Education teacher who I used to work with. As I said in my previous messages, I am not very good on the phone and with small talk, so I think about my friends all the time and think about calling them, but don't act on it. I was so happy that she did take the time to give me a call and to catch up. She told me that she and some of the other teachers that I worked with have finally retired. She also mentioned that right after she retired she slipped and broke her foot! She is the fifth person that I know who broke a foot this year.

I have a friend, Rosemary who travels and assists me when I teach and it seems like when things happen to me or her, then the other has the same problem. It started last year with some female problems. I found out that I had to have surgery and a few weeks later she found out she had the same problem and had to have surgery. It's too bad that we don't live closer to each other because we weren't able to keep each other company. After that, I found out that I had cataracts and had to have surgery on both my eyes. A month later, she found out she had to have cataract surgery too! Well a few months ago, she fell down and broke her foot. Lo and behold, a couple months after that, I fell and broke my foot! We are both hoping that nothing serious happens to either one of us in the near future! Her daughters suggest that maybe we should stop hanging around together.

After my accident, I contacted one of my good quilting friends and teacher, who lives in Virginia, to tell her what happened. I found out that she fell down during a vacation and broke her ankle in 3 places, so she was confined to the house for a few months. I was posting an image of the boot on my foot on Facebook and two of my FB friends told me that they also broke their feet this year. I sure hope that this is the last of our calamities for a long time!

I do want to congratulate Patience Griffin again for winning the last drawing. She told me about her website and that she is an author of quilting related books. She is also having a drawing on her website Patience Griffin for one of her books. I love reading books by quilters about quilters! Please visit her website to check it out and enter her drawing.

The current fat quarter collection that I  am giving away tomorrow is another part of the P&B Luxury Essentials collection that I gave away in the first drawing. The colors are just yummy! I love the gold swirls in it.


I started playing with it using my patterns and I decided to use the Glorified Nine-Patch with a Twist pattern. It involves curve piecing but don't let that scare you. The pattern can be made with 4", 6", or 9" templates. Since there are only 7 fat quarters in this group you will have to add some fabric of your own to complete the 4" block (12" square), 6" block (18" square), or 9" block (27" square). I have made this quilt with both 4", 6" or 9" templates with 9 light and 9 dark or medium fat quarters. For the 4" block fat eighths will be enough.


The original quilt I made for this pattern uses the 4" template set. I made this quilt with a group of fabrics I won from Miniature Quilt Magazine for one of my quilts that I entered in their Miniatures From the Heart Contest. I entered this mini quilt in one of the local quilt shows in St. Louis and it won a first place prize in the miniature division! I think it won because I matched the binding to the fabrics along the edge of the quilt. I have instructions in the pattern how to do this so you can do it on any quilt to give it an extra detail that will impress your friends and judges for shows. I hope you can see the binding in this image.


I have some wonderful tips for sewing curves for perfect seams and no pleats every time and will include them in the next post after I announce the winner. You can find the pattern along with the templates here: Glorified Nine-Patch pattern and 4" templates. The winner will receive these fat quarters and the pattern with the 4" template set. There is also a 6" and 9" template set available for purchase to make this quilt. Instructions for all 3 sizes are included in the pattern. I am still having that 20% off all regular price purchases so it would be a good time to purchase a template set if you want one. 

Please leave your comment at the end of this post to let me know how you would use these fabrics and I also want to know how you feel about curved piecing. Please share this blog with your quilting friends. Good luck!

As always; do what you love and love what you do. Thanks for reading, Toby Lischko


Sunday, November 23, 2014

WINNER #2

My husband woke me up early yesterday morning panicking, because he went to feed the kittens and none of them showed up. They ALWAYS come to breakfast. My thoughts first were that a coyote got them. I lost 3 cats in the last few months and I wasn't sure I could handle losing all 6 kittens! Mike told me that because the cats travel in a pack that he doubted that that happened. As he was getting ready to go outside to look for them he looked out our back sun room window and said that he saw 3 of them behind the fence. His first thought was that because our neighbor was deer hunting and he couldn't find the dear, that maybe they found it (thus they weren't hungry). We called them and then the other 3 showed up.

I have always had indoor cats until we moved out to a more rural area. I never had to worry about anything happening to them other than growing old or coming down with some type of disease (cancer, etc.). We have had cats and dogs since before we got married. Since we have been together (it will be 45 years this December, married for 42 years) we have had 19 cats (we currently have 8) and 9 dogs (we currently have 2).

I always wanted cats when I was a kid but my brother had terrible allergies and asthma so we weren't able to. I used to cut out pictures of cats in my mother's magazines and keep them in an album knowing that it was as close as I was going to get to having a cat as a child. My husband was never allowed to have any animals and loved dogs but his mother grew up believing dogs do not belong in a house. So we knew we both wanted to have animals in our lives. He never liked cats but when I started bringing them home, he had a hard time saying no! It is always hard to lose a pet. Some I have been more attached to than others. Only people who own pets can understand the connection that there is. It just reminds me that everyday that they are with us is very precious.

Anyone who has ever own a cat knows that we don't really own them and they come into our lives sometimes by accident and sometimes on purpose. Our first outdoor cat was discovered in a neighbor's bass boat while he was fishing over 10 years ago. He realized that there were kittens with her and knew that if anyone could get them out of his boat, Mike could. Mike was able to coax her out with food, and while she was eating he was able to get her two kittens. He built a little home on our front porch for her to raise them. We never really gave her a name so we just called her momma kitty. We gave her two kittens away, but she continued to stayed close to home. We were never really able to get very close to her. She was just not a people cat. The last couple of years she was willing to let us pet her just a little. We didn't know how old she was when we got her but recently we noticed that she was losing weight and her fur was a disaster which, with cats, is a sign that something was wrong. She continued to have a good appetite and was active so we never thought anything about it. Just that she was getting old. Well, a couple weeks ago she did not show up for breakfast and we knew that something was not right. We didn't see her at all after that so we figured she just went somewhere in our woods to die. Rest in peace momma kitty.


I could go on forever talking about my animals, but I will tell you a little about each one in future posts.

Now to the winner. I was so happy to see that there were a lot more people reading my posts and leaving comments. I hope each of you share my blog with your quilting friends and they share it with theirs. I would love for more people to follow my posts and share in my personal and quilting life. People who know me, know that I am a very private person, but every little bit of myself I can share with others, helps me to open up a little bit more. People say that keeping a journal is a good thing, so I will use this as my journal.

Today's winner is Patience Griffin! She said "From a distance this looks like a complicated pattern, but up close it looks easy. I love this pattern. I would love to make this for my cousin who loves quilts and has been a wonderful cheerleader in my life." Congratulations Patience! Please email me with your address so I can send you your prizes. Everyone else, don't give up. I have 9 more drawings! 

I said I was going to show you how to use my Cutting Corners template set with this pattern. This template set and my North Star set are both available for purchase on my website. I am currently having a 20% off all regular priced items on my website until December 15 (along with fabrics for as low as $5 a yard) so this would be a good time to purchase either one. That also includes my Mosaic Magic pattern.


In the Mosaic Magic pattern, there is a triangle on the ends of long strips and half-square triangles. 


There are two templates that are included in the set. One is a right angle triangle. It can be used to make half-square triangles and eliminates the need to draw a line on the back of the squares used to create those triangle ends. 

When making half-square triangles, you do not need any special math. You only need to know the size of the finished square. As you can see in this photo there are lines on the triangle. They give you the size of the finished piece. If you know that size, you only need to add your usual 1/2" seam allowance when cutting strips. Place the two strips right sides together and cut them out at the same time by lining up the appropriate line on triangle to the bottom of the strip. Then take them to the sewing machine and sew along the long edge. This particular strip was cut at 2" and will create a 1-1/2" HST. You can also see that the corners are trimmed before sewing so you have no dog ears to trim after sewing.


You can also use this template to eliminate having to draw a line on the back of a square in patterns that tell you to do this for a variety of blocks such as Snowball or Flying Geese. I originally designed this template set because I thought that drawing that line was a waste of time. The edge has to be trimmed anyway. This is a strip that is 3-1/2" wide and I place a 3-1/2" square on the right end of the strip. The template is lined up along the left edge of the square and the 3" mark along the bottom of it. The seam line (dashed line) goes through the right bottom corner. Just trim and sew it with a 1/4" seam allowance. You do not have to be afraid of bias edges. Just don't stretch the edge when you are sewing and let the machine do the work. I finger press everything before I take it to the iron (dry iron) so that I know that the seam is nice and flat and it doesn't stretch the seam.


I will show you how to use this template set more with some of the other patterns that I will be giving away.
 
Here is a sneak peek of the next bundle I will be giving away.  It is another bundle of P&B's Luxury Essentials that I gave away in my first drawing. It has a very cute gold swirl in it. Tomorrow I will play with it in some of my patterns to show you how you can use it. You can put your comments in tomorrow's post for the next drawing.


Stay warm and dry and come back tomorrow. As always; do what you love and love what you do. Thanks for reading. Toby Lischko