Search This Blog

Showing posts with label #weeklydrawing. Show all posts

Thursday, August 30, 2018

Hearth and Home Block of the Month - Month 1

I design my quilts in EQ!


I frequently work with many of the fabric companies designing quilts to go with their new fabric collections. RJR is one of those companies that I do a lot of commission work for. They always have such beautiful fabrics that are easy to design with. In the beginning of the year they sent me a fabric collection called Family Roots which I immediately started playing with on my EQ8. I had been doing some sampler quilts with some previous companies (Soldier's Quilt) and collections so I thought I would try to do another one. I came upon with this concept. I love using log cabins in quilts and felt that this was an unusual setting that was different than other BOMs that I have seen.

RJR liked it and submitted the design to Missouri Star Quilt Company. They liked it too! So they picked it up and are selling it on their website. It is a nine month series and Missouri Star will be selling the kits each month for the next nine months. There are 13 fabrics in the quilt. Two of them come from a different fabric collection called Falls Majesty. You can purchase the first month's kit here: Hearth and Home BOM.

Each month you will receive the fabric in fat eighths, fat quarters or regular yardage to make the block(s) for that month. The pattern will include instructions for each block. To save me from having to print too many pages, I have designed cutting charts for each of the fabrics in pdf form. To receive the cutting charts you can use the contact form on this page to request them.

Each month I will be doing a short tutorial on piecing one or more of the blocks. If there is more than one technique that I will be discussing, I will divide it up into two or three separate tutorials. I will not be discussing cutting instructions or specific block piecing instructions. Those are in the pattern and you will have to purchase it with the kit if you want to make it.

To start off, before I talk about the blocks, I think it is important to discuss your 1/4" seam allowance. If you have not seen my Youtube video yet, here it is on how to establish an accurate 1/4" seam.


Because most of these blocks have numerous pieces, accuracy is very important. I always set my seam and make a test block with my own fabric. (You don't want to cut up the good fabric yet!) Measure each section for accuracy. It is easier to make adjustments at this level before sewing the parts together. Once you get that established you don't have to make any more test blocks. If you want to purchase my seam guide you can find it here: Perfect 1/4" Seam Guide.

Month 1 includes Blocks 1 and 2 and the connecting block (log cabin).


Block 1 has no special instructions. It is basically made of half-square and quarter square triangles sewn together. Just be sure to size up each section to the specifications of the pattern.

Block 2 has Half-Square triangles and Chevrons. The squares for the half-square triangles are cut slightly larger than needed so that once you piece them you can trim the patches down to size. You can either draw a line on the backs of the lighter fabric, sew 1/4" on each side of the line, cut apart and then trim the square to the size listed, or just cut them into triangles, sew them together and then trim it to the size listed. Don't be afraid of sewing on the bias. Just let the sewing machine do it's job and don't stretch the edge as you sew. I always add a pin at the end of the triangle so that the edges stay together when I sew it.

The Chevron patch is made with squares and rectangles. Again you can draw a line on the backs of the squares, sew on the line and then trim the seam to 1/4" or you can use my "Cutting Corners" template set to trim the corners and then sew with a 1/4" seam allowance. You can purchase my Cutting Corners template set here: Cutting Corners. It can be used a lot with the blocks in this quilt. 


I'll save tips for the log cabin connecting block for the next blog. 


DRAWING

As an introduction to this quilt I will be having a drawing for some fat eighths of the collection. If you would like to be in the drawing simply leave a comment at the end of this blog. You do not have to purchase the BOM kit to be in the drawing but you don't want to miss out on making this fantastic quilt! I will draw a name on September 2. Good luck.

As always, do what you love and love what you do. Thank you for reading and be sure to share this with your quilting friends. Toby.


Monday, August 20, 2018

ISLAND BATIK AMBASSADOR AUGUST CHALLENGE PART 3


The Great Outdoors Blog hop

The great outdoors are what inspired the this hop’s theme. Throughout the month of August, our Ambassadors will be featuring Island Batik’s newest fabrics, appearing on shop shelves SOON! See something you like? Ask for it at your local quilt shop, or request it if you don’t yet see it. We have the most delicious collections to share with you!


Today is my day and as usual I was down to the wire. I put the binding on the quilt at 9:00 last night. I don't think I have ever put on a binding on as quick a time as I did this one. ****Be sure to read all the way to the end so you learn how you can be eligible to win a fat quarter batik bundle and my Cutting Corners template set and a strip pack from Island Batik.****

Before I reveal the quilt I want to show how I made the second part of the block. The patches that attaches to the flower have triangles on the ends of them. They are made with squares. You can draw a line on the backs of the squares and sew on the drawn line or you can do what I do and use my "Cutting Corners" template set.

Place the square on the right end of the smaller rectangle strip. Make sure that the edges are perfectly lined up.

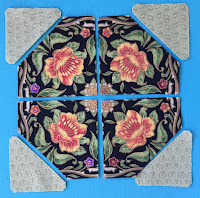
Using the triangle in the set, line up the edge of the triangle on the left edge of the square with the top of the triangle even with the top of the square. The diagonal line should go through the bottom right corner.

Using your rotary cutter, trim off the corner and sew with a 1/4" seam.

You will repeat the process with the longer strip except place the strip vertically with the square at the top of the strip. 


You will end up with a left and right strip.


You piece the rest of the block like a log cabin.
                                             
I was working on this quilt during a quilt retreat called "Summer Breeze" so I asked the group what should I call the quilt and they said call it "Summer Breeze" after the retreat! I pieced many of the blocks at the retreat so I laid down the pieces to see what they would look like. ( I was still missing 4 blocks.)


I then thought, what would it look like with white sashing strips? I definitely liked this version better.


After I got home, I finished the blocks and put it on my design wall. I couldn't decide on whether I wanted to put on a border or not so I cut some strips to see what it would look like with a border. I also added four orange corner stones where the flowers came together.

Without borders

With borders

I decided to go ahead with the small border. Here it is on my quilting machine. I decided to quilt the background with small circles to match the border print (which is actually bubbles).


So.......here is the finished quilt! It is 57" square with an 8" block.


A close-up of the quilting


I really had fun making this one. I decided to make a pattern of it so I am offering a special discount if you preorder the pattern. (It will take me a couple weeks to write it.) The pattern will come with enough freezer paper sheets to make the 24 blocks. So for a limited time you can get the pattern for $12 (regular price will be $15 with the foundation papers). I will make the pattern available in pdf form after it is written. It will be $12 regular price.

You can preorder the pattern here: Summer Breeze Pattern.

I used 25 fabrics from the collection. 5 groups of 5 fabrics. It was my surprise bundle in my box from them. You can see the whole collection here:
Ocean Odyssey by Island Batik

ISLAND BATIK GIVEAWAY

Island Batik is giving away three strip packs in their Rafflecopter, just follow this link.


GATEWAY QUILTS GIVEAWAY

I will be having a drawing for a fat eighth bundle of the collection and my Cutting Corners template set. Just leave a comment to be in the drawing. I will draw a name a week from today (August 27). Be sure to leave your email so that I can contact you if you win. US only due to shipping charges.

As always: Do what you love and love what you do. Feel free to share my blog with your quilting friends. Thank you for reading. Toby

Be sure to check out the other blog posts especially Karen Overton's who also used Ocean Odyssey in her quilt.

Monday, August 6 - All A Flutter - Yellow Cat Quilt DesignsCreative Blonde

Tuesday, August 7 - Birds N’ Bees - Ark Angel CreationsPatterns By Jen

Wednesday, August 8 - Canterbury Manor - Sally MankePowered By Quilting

Thursday, August 9 - Eclectic Garden - Desert Bloom QuiltingSew Karen-ly Created

Friday, August 10 - Vintage Morris - MooseStash QuiltingDevoted Quilter

Monday, August 13 - Safari - Sew Incredibly CrazySweetGrass Designs

Tuesday, August 14 - Spring Blossoms - Mary Mack Made MineIf These Threads Could Talk

Wednesday, August 15 - Victoria and Albert - Bejeweled QuiltsClever Chameleon

Thursday, August 16 - Wild Things - Freemotion By The RiverKauffman Designs

Friday, August 17 - Petting Zoo - Den Syende HimmelSarah Goer Quilts

Monday, August 20 - Ocean Odyssey - Gateway QuiltsThe Quilt Rambler

Tuesday, August 21 - British Rose - Busy Hands QuiltsMania for Quilts

Wednesday, August 22 - Dear William - The Inquiring Quiltermmm! QuiltsLiving Water Quilter

Thursday, August 23 - Dragonfly Dreams - Inchworm FabricsBeaQuilter

Friday, August 24 - Fur-ocious Friends - Quilting Affection DesignsDizzy Quilter

Monday, August 27 - Globetrotter - Pamela QuiltsCurliecue Creations

Tuesday, August 28 - Jungle Cruise - Vicki's Crafts and QuiltingLittle Bunny Quilts

Wednesday, August 29 - Lavendula - Carole Lyles ShawMasterpiece Quilting

Thursday, August 30 - London Calling - Quilt in a Not-ShellLizard Creek Quilting

Friday, August 31 - Spirit Rhythm - Steph JacobsonWhispers of Yore

Monday, September 3 - Sweet Tweets - Kathleen McMusingAdventurous Applique and Quilting

Tuesday, September 4 - Whatnot - heARTS CreationsSlice of Pi Quilts


Friday, December 9, 2016

STATE BLOCK CHALLENGE DELAWARE

I hope everyone had a great Thanksgiving. I know it has been a while since I posted the blocks. I told you that we got puppies in October. I'm not as young as I used to be. They are wearing me down. I fall asleep at all hours during the day. If I am not moving or doing something, as soon as I sit down I end up taking a nap! I've got to figure a way to get them to sleep longer at night.

I went to Texas last week to teach at two guilds. I had such a good time. I stayed with two wonderful quilters who treated me like family. Here is a photo of the finished blocks from my Parfait class in New Braunfels. This class is from my new Kaleidostars book. Everyone looks happy!


I also got a chance to visit with my son in Austin. He took me to the Alamo and the River walk in San Antonio. It was a beautiful day and I had a great time with him. I don't get to see him that often. (Don't I look happy!)


I think I am behind picking winners for my blocks. I have decided to just draw names instead of having quilters vote because it seems that the same people are picked and I don't want to leave anyone out. So those who finished my Connecticut blocks, if you haven't sent the images to me, please do so I can draw a name next week. Please email them to me instead of sending them through Facebook or Messenger. It is easier for me to put your name to it when you do that. Send them to tlischko@yahoo.com.


Just thought you would like to see a recent photo of my puppies. In a month they have doubled in size!


This week's block is Delaware. I had some problems finding a second block but with perseverance I did find it.

Block A

This is a simple 9-patch with a Snowball block. I used the dark focus fabric, one light and one medium print. I cut up the large Snowball instead of having one large piece. That is what is fun about doing these blocks. It is a challenge for me to figure out where I want to fussy cut a simple block.


CUTTING INSTRUCTIONS


Focus fabric 1 :
* Cut two sets of four repeats with template C.
Light fabric 2:
* Cut (10) 2-1/2" squares (or use template A)
Medium fabric 3:
* Cut (8) 2-1/2" squares (or use template A)
* Cut (4) 2-7/8" squares; cut each once diagonally into (8) HST (or cut (8) template B).

PIECING INSTRUCTIONS

1. Sew the four Focus fabric 1 Template C together, then sew on Fabric 3 HST (template B) on each corner. Press to corners. Make 2.


2. Sew the (5) Fabric 2 light squares (A) and (4) Fabric 3 medium squares (A) together to create a nine-patch. Press patches to medium fabric, then press rows to center. Make 2.


3. Sew the nine-patch squares to the Snowball squares. Press to Nine patch.


Block B

This block is a little more challenging. It's like a nine-patch that was cut on an angle. I chose the dark focus fabric for two different sections of the block. If you want to fussy cut just the center then that is okay. I also chose a light and a medium dark.


CUTTING INSTRUCTIONS


Focus fabric 1:
* Fussy cut four repeats with template C.
* Fussy cut four repeats with template B right side up. Place a small pin or use a marking tool to identify the straight of grain edge. (Marked on the template.)
Light fabric 2:
* Cut four template B with the template turned wrong side up, and cutting one layer at a time or have all four layers face up. (There is a left and right side of B so you need to make sure that 4 are cut with the template face up and 4 with it face down.) Place a small pin or use a marking tool to identify the straight of grain edge.
Medium Dark fabric 3:
* Cut four template A. Place a small pin or use a marking tool to identify the straight of grain edge. (Marked on the template.)

PIECING INSTRUCTIONS

1. Sew the four template A patches together.


2. Sew the light template B template C sections together. Make sure that the side with the pin on it is on the outside. Make 4. Press to C.


3. Sew the fussy cut template B to each end of step 2 as illustrated. Pay attention to the straight of the grain edge on template B. Make 2. Press to fussy cut B.


4. Sew the sections from step 2 to opposite sides of the center section, matching seams. Press to center square.


5. Sew the sections from step 3 to the other two sides. Press to center square.


I hope you have fun making these blocks. I really did. Here are the templates. Remember, save them to a folder then open them. Please let me know if you have any problems opening them.

Delaware Block A templates
Delaware Block B templates


Please feel free to share your blocks with me. This is the final block that I will do this year. (I'm sure you will need a break with the holidays coming up.) I will start up again on the first Monday in January. Thank you for participating.

Merry Christmas, Happy Chanukah, and Happy New Year!

As always: Do what you love and love what you do.

Monday, November 7, 2016

STATE BLOCK CHALLENGE CONNECTICUT BLOCKS 7A AND 7B

I love when the air gets cooler and I get to get my sweaters out! I especially like those new type fabrics that have a very soft feel against my skin. As I get older I can't stand anything scratchy on my skin. I have to cut off the tags on the inside of the neckline on anything because it drives me crazy!

I have been getting very little sleep lately. The puppies are keeping my husband and I very busy! I forgot what it is like training a puppy and we have double the trouble. The great thing is they are very smart and learn quickly. We almost have house training done. They still have an occasional accident but that is more due to us not paying attention to the signs. (This is a short video. Please let me know if it works.)


So on to the next blocks. But first the winners of Blocks 5A and 5B.

Block 5A was won by Rosemary Krupski again! Congratulations Rosemary!


Block 5B was a tie! Jeannie Schultz and Rosemary Krupski both got the same number of votes. So they both get a pattern. Congratulations ladies.


To encourage more people to send me images of their blocks I am going to do a random drawing instead of voting. That way more people have an opportunity to win one of my patterns and increases the odds of other people winning.


This week's block represent the state of Connecticut. Neither of the blocks are difficult to piece but block A has more fussy cutting in it.

BLOCK 7A


For this block I chose just two fabrics. The focus fabric and a contrast. I fussy cut all of the light sections of the block, the half-square triangles, flying geese and diamond in a square. You can use some of the templates that you made for some of the previous blocks.

CUTTING INSTRUCTIONS


Focus fabric:
*Fussy cut (4) template A from one design, (4) template A from another design, and (4) template B.
You can always cut more or less of a design than I did.
Contrast fabric:
*Cut (16) template A OR (8) 3-7/8" squares cut once diagonally into (16) HST.

PIECING INSTRUCTIONS

Center section
1. Sew the (4) fussy cut template A pieces. Press seams in a clockwise manner.


2. Sew a contrast fabric HST to each side. Sew opposite sides first. Press to contrast fabric. Section should equal 6-1/2" square.


Flying Geese Units
3. Sew a contrast fabric HST to the short sides of the focus fabric template B. Press to contrast fabric. Make (4). Sections should equal 3-1/2" x 6-1/2".


Half-Square triangle units.
4. Sew a contrast fabric HST to a focus fabric template A. Press to contrast fabric. Make (4). HST should equal 3-1/2" square.


5. Layout the (4) HST units, (4) Flying Geese units, and center units as illustrated. Sew across. Press to Flying Geese units. Sew rows together. Press to Flying Geese units.


BLOCK 7B

For this block I chose a dark and light focus fabric and then a dark and light contrast fabric. You can use the same template A from block 7A for this block.


CUTTING INSTRUCTIONS
Focus fabric light
*Cut (2) template D.
Focus fabric dark
*Cut (2) template D.
Contrast light
*Fold fabric wrong sides together and cut (2) B and (2) C. (B and C will be cut at the same time.)
*Cut (2) template A. 

Contrast dark
 *Fold fabric wrong sides together and cut (2) B and (2) C. (B and C will be cut at the same time.)
*Cut (2) template A. 


PIECING INSTRUCTIONS
1. Sew a light contrast B and C to a dark D and a dark contrast B and C to a light D. Press seams in the same direction. (Both left or right.) Make (2) of each.


2. Sew a light template A to the light matching sections and a dark template A to the dark matching sections. Press to HST. Section should equal 6-1/2" square.


3. Sew the four squares together. pressing seams in the same direction as the sections. All seams should go either clockwise or counter clockwise.


Here are the links to the template PDFs. Don't forget to save it and then open with Acrobat Reader.

Template 7A

Template 7B

Remember; Always do what you love and love what you do. Please share your finished blocks with me. No matter what they look like, I love to see what everyone is doing. Plus you will be eligible for a drawing for one of my patterns so the more you do and send me, the better your chances.